Version 1.0
March 15, 2021
TABLE OF CONTENTS
Revision History
Revision | Date | Author | Description |
1.0 | 03/15/2021 | Mike Bishop | Initial creation. |
Login
- When you log on to a Kofax Capture V11 server you will be prompted for your Capture credentials. This should be your scan station name for the User ID and no password.

Scanning
- Click on the Windows Start button to bring up the Start menu. Then click on the Scan icon to open the Scan module.

- When the Create Batch window opens click the dropdown to the right of the Batch class field.

- Using the scroll bar select the batch class that you’d like to scan.

- Click the Scan button.

- The scanned document will appear in the Scan module window.

- If you need to add a single document to the batch insert the page into the scanner then click the Scan button.

- If you need to add a multiple documents to the batch insert the pages into the scanner then click the Scan All button.

- When you have completed scanning documents click the Close button.

- When prompted to close the batch click Yes.

- When returned to the Create Batch window click cancel.

- To exit the Scan module click the Kofax Button in the upper left corner of the window.

- Click Exit on the dropdown menu.

Validation
- Click on the Windows Start button to bring up the Start menu. Then click on the Validation icon to open the Validation module.

- When the Open Batch window appears select a batch to validate then click OK.

- When the batch opens click in one of the fields to enter ID information (in this example the Student ID field is used).

- Press the Tab key to tab out of the field and to auto-populate what can be auto-populated for the batch (Student ID in this example).

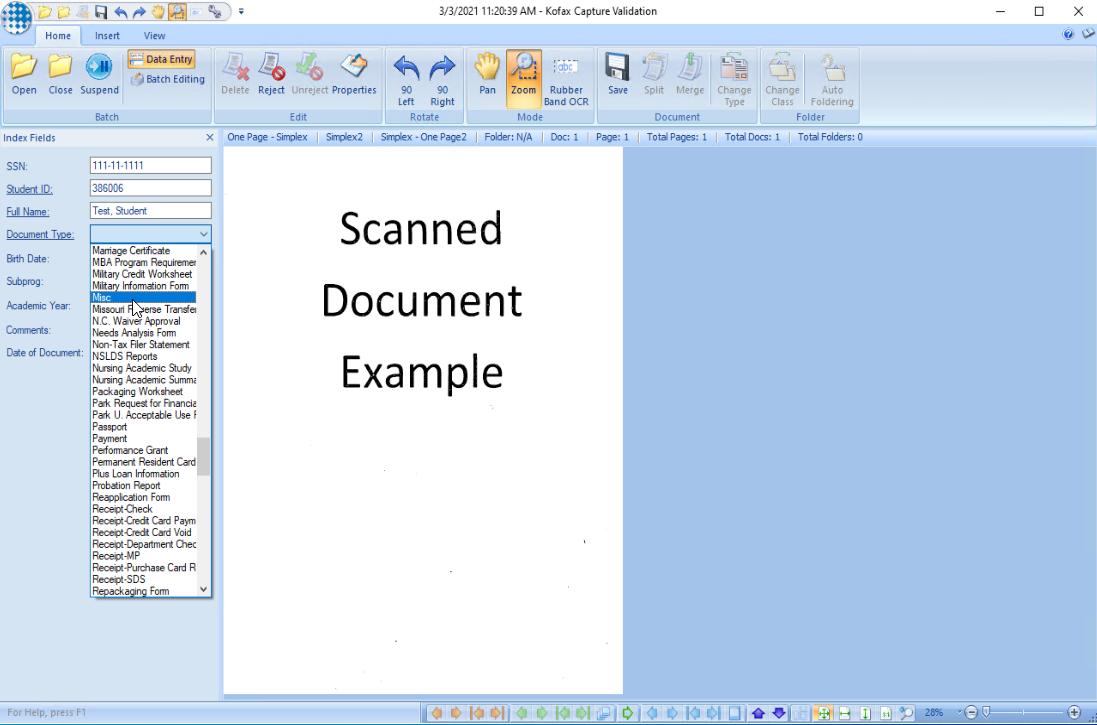
- Click the dropdown arrow next to the Document Type field.

- Select a Document Type from the Document Type list.
- Enter any additional information (Comment in this example).

- When all information has been entered click the Close button to close the batch.

- When prompted to save data before closing document click Yes.

- When returned to the Open Batch window click Cancel.

- To exit the Validation module click the Kofax Button in the upper left corner of the window.

- Click Exit on the dropdown menu.

Batch Manager
Batch Manager can be used as a one-stop application to scan and validate without having to go into the individual scan and validation modules.
- Click on the Windows Start button to bring up the Start menu. Then click on the Batch Manager icon to open the Batch Manager module.

- When Batch Manager opens click the Create Batch icon on the upper left corner.

- When the Create Batch window opens click the dropdown arrow to the right of the Batch class field then select the batch class.

- Once the batch class has been selected verify the batch class then click Save.

- Click Close.

- When returned to the main Batch Manager window select the batch just created then click the Process button in the upper left corner.

- Insert the document into the scanner then click the Scan button.

- Once all documents have been scanned into the batch click the Close button.

- When prompted to close the batch click Yes.

- The document will now show that it is in the Validation queue. Select the batch to validate then click the Process button.

- Enter all validation information.

- Click Close to close the batch.

- When prompted to close the batch click Yes.

- The batch will now be in the KCN Server queue which means that it’s ready to be transferred to the server then into FileNet. It will be automatically uploaded or can be forced immediately by using the Remote Synchronization Agent described in the Remote Synchronization.

- To exit click the Kofax Button.

- Click Exit on the dropdown menu.

Remote Synchronization Agent (RSA)
The Remote Synchronization Agent (RSA) can be used to immediately transfer documents to the server so that they will be ingested into the FileNet system. It can also be used to renew the scan station license if you get a message stating that it’s expired.
- In the lower right of the Windows Desktop click the up arrow to show hidden icons.

- Doubleclick the Remote Synchronization icon to open it.

- When the Remote Synchronization Agent window opens click the Synchronize Now button.
Note: This will also renew the scan station license if it’s expired.

- Looking at the Remote Synchronization window verify that the batch or batches successfully uploaded.

- When the synchronization is complete the Status will be done. The window can now be closed by clicking the Hide button.
